
Homebuilt Backyard AllSky Camera Version 1 & 2
AllSky Camera build Version 2
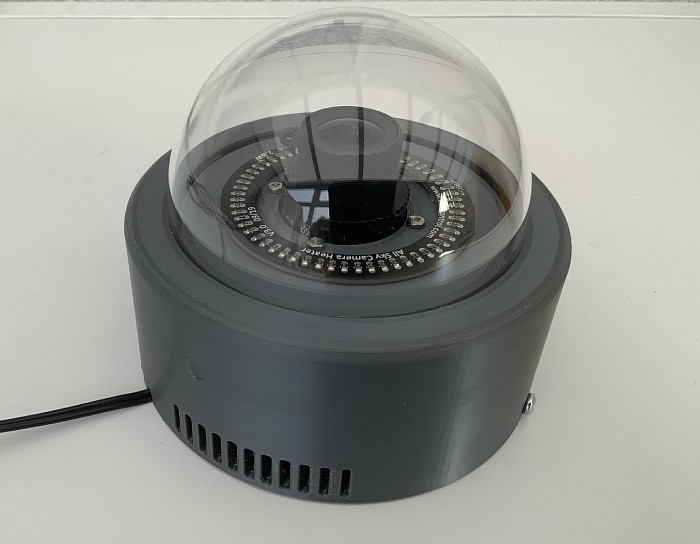
This is my second iteration of the AllSky camera, the version 1 had a few issues with the small raspberry PI zero not being powerful enough with only 512mb of RAM. It would not create a Timelapse every night and was missing some, so decided to upgrade to a full blown Raspberry PI4 with 4mb of RAM, but for this I needed a new case that would take the extra size of the bigger RPI, all other internal are the same, used the existing Raspberry HQ camera and the same 150 degree angle lens, the dome dew heater ring has also been recycled, the dome is new but the same as the original. The same superb and free AllSky software from Thomas Jacquin was used, which had had a few updates since I last installed, and it even better now, also slightly easier to install, the link to this is Here. So for the full build please see the build video in the YouTube videos section of this site.
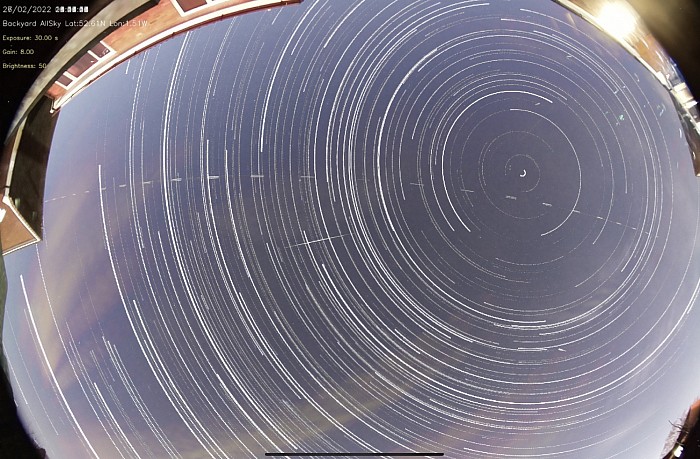
First Star Trail image & Timelapse video from the new AllSky camera below.
AllSky camera build version 1 Update
This was my first attempt into building my own AllSky camera, the design was not mine but one I found on thingiverse, which was available for anyone to use, link here, it worked ok, but had a couple of flaws, namely only room inside to fit the tiny Raspberry PI zero module, which was just not powerful enough and started to give me issues, and only produce a Timelapse every few days, the RAM on this was just 512mb, which was just not cutting it, but to use as just a cloud cam while imaging it did the job well.
AllSky camera build version 1
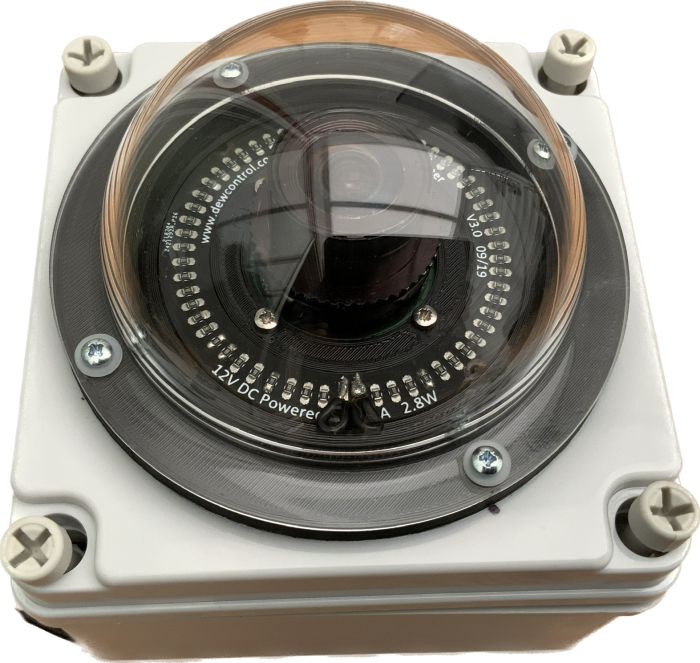
I built this backyard AllSky camera using the fairly new raspberry PI HQ camera, with a 150 degree lens, and controlled with the raspberry PI Zero version 2. Controlling fully automated software is by Thomas Jacquin, and is available on GitHub free.
The case was 3D printed from a file found on thingiverse, and was designed purposely for using the PI Zero, so it’s small and compact. The dome was a cheap one from eBay and works really well. The dome heater ring, which can be seen inside the dome in the picture, is from dewcontrol and is 12v powered.
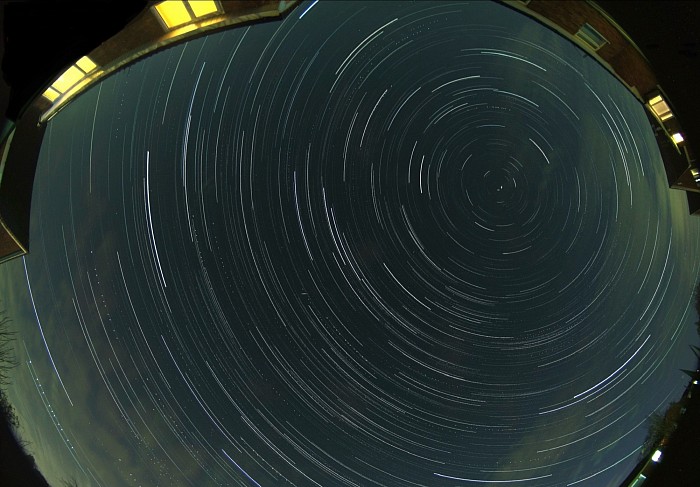
The software is set up to create a Star Trail image and a Timelapse video at the end of every night, examples of which you can see below.. It’s mounted in my back garden in a slightly elevated position to get the best possible view of the night sky, and not so much in the way of surrounding houses.
Backyard Star Trails image, and couple of Timelapse videos below, all from backyard
