NINA imaging tutorial
A basic NINA tutorial to get you started
NINA (Nightscape Imaging 'N' Astronomy) is a popular astrophotography software package designed to aid astronomers in capturing high-quality images of the night sky. It offers various features like autoguiding, camera control, image stacking, and more. Below is a step-by-step tutorial on using NINA to take images of the night sky:
Note: Before starting, make sure you have the necessary equipment set up, including your telescope, camera, and any autoguiding equipment. Also, ensure that your camera and other devices are properly connected to your computer.
1: Download and Install NINA
Visit the NINA website (https://nighttime-imaging.eu/) and download the latest version of NINA for your windows operating system
Install NINA following the on-screen instructions.
2: Connect Your Equipment
Launch NINA.
In the main NINA window, click on the "Equipment" tab. Here, you'll configure your camera, mount, and other devices.
Click "Add New Camera" to add your imaging camera. Select your camera model from the list, and NINA will detect it if it's properly connected. Configure camera settings such as exposure time, ISO, and image format.
Click "Add New Mount" to configure your telescope mount. Select your mount model, and NINA will detect it if it's connected. Ensure that your mount is properly aligned and tracking.
If you have an autoguider, configure it under the "Add New Autoguider" option.
3: Create an Imaging Sequence
Click on the "Sequencer" tab in NINA.
Click the "New Sequence" button to create a new imaging sequence.
Set the target name and coordinates for your imaging session.
Define your imaging plan by specifying the number of exposures, exposure time, filter changes (if applicable), and any other imaging settings.
4: Autoguiding Setup (Optional)
If you're using autoguiding, configure it in NINA:
Click on the "Guiding" tab.
Connect your autoguider camera, and select it from the drop-down menu.
Click "Start Guiding" to begin autoguiding. NINA will select a guide star and make real-time adjustments to your mount to ensure accurate tracking.
5: Start Imaging
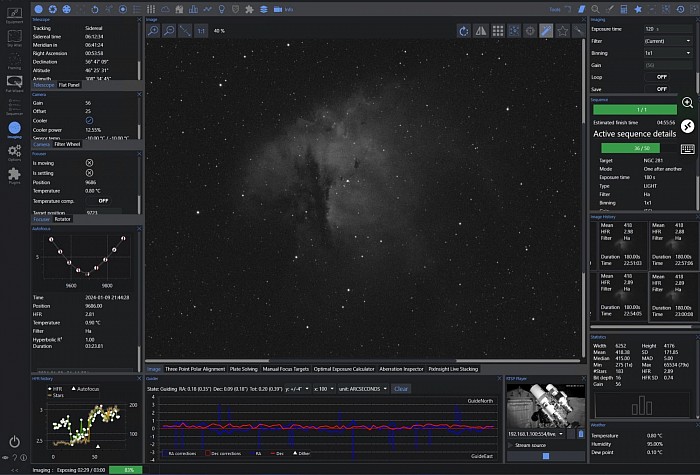
Return to the "Sequencer" tab and click the "Run Sequence" button. NINA will start capturing images according to your defined plan.
Monitor the progress of your imaging session in the sequencer window. NINA will display the status of each image and provide real-time feedback.
6: Image Review and Post-Processing
After your imaging session is complete, you can review your captured images within NINA.
Export your images to a location on your computer for post-processing using software like Adobe Photoshop, PixInsight, or DeepSkyStacker.
7: Disconnect and Shutdown
When you're finished, disconnect your equipment safely. Power off your camera, telescope mount, and autoguider.
Close NINA and save your session settings if needed.
That's a basic overview of using NINA to capture images of the night sky. Remember that astrophotography can be a complex and equipment-intensive hobby, so don't be discouraged by initial challenges. Practice and patience are key to improving your skills in astrophotography.


